Showing posts with label heart. Show all posts

Sunday, November 30, 2008

Valentines Day Themed Crazy Quilt Heart Class

Do you remember some time back when I had posted 2 naked hearts for one of the classes I'll be teaching?  I had finally started embellishing them.  It had taken me around 2 months to really dream up what was to be for both of them.  I finsihed the pink and white one and moved onto the red and white one.  I embroidered my first peacock, who i thought was very dorky looking, then I adjusted his eye a bit and was a little more pleased, but still, much to learn in the way of making peacocks.  Next time i won't outline his body in black that's for sure!  Anyway!  Last Sunday 11-23 while shopping, I had taken them with me while looking for a few embellishments.  I lost them.  Yep you read it right.  I lost them.  I didn't realize it until I got home with dinner and my boyfriend and I were about to sit and watch a movie and eat.  As the movie was playing and i was picking at my food, I instinctivly went to reach for my red and white heart to work on it and then I couldn't find it.  Well we looked everywhere.  Tore the apartment down, looked in the bags and in my purse and emptied everything 6 or 7 times, checked the freezer and the refridge, checked all over the car and found nothing.  We retraced our steps back to Joann and the parking lot... still found nothing.  I left photos of each heart with my name, phone number and that I'd pay a cash reward for them if found.  A week later and still nothing.  That night, even though I felt completely horrible and like my world was coming down, I sat and whipped up 3 new hearts on the machine.  I managed to fully embellish one to take as my class sample for Tuesday.  The store had been asking for a class sample and if it's going to be a January class, people should at least have a good month to look at it ya know?  So I raced against the clock and finished the new pink and white one.   It's almost a replica of the old one but it's all I could manage given I only had a day to work on it.  

I brought it to the store and the owner is out for a week, but the one woman who works there is so sweet and was very flattering even saying she'd be signing up for the class!  I feel so unworthy or something lol!  Like it's so simple I feel so silly when I get compliments, even though I agree they're beautiful I feel like anyone can do it!  Oh well, overall I am thrilled I got them a class sample, but I sure do miss my old ones.  

Here are some photos...

These are the original 2 that I recently lost, the pink and white one was finished.  The red and white one was in the works...


The 3 new hearts I made.  I know the top left one is way too busy.  It'll surely be a 'what not to do' piece ;)


Class sample finished...


Close up of the fully open roses, they were fun!

I miss my old hearts but I really hope whoever found them will treasure them as much as I do...

Crazy Quilt Christmas Ornament Swap!

I finally got my pretties back!  And wow they sure are lovely! 

These are the two that I sent in:
I have some of my needle tatting on the left one and lots of silk ribbon embroidery on the right one!

And these are the two I got back!  How beautiful are they!  They're so shabby chic! ...and guess who loves shabby chic?! ;)  I love all of the stitching and charms and lace and how cool is the one that is in the shape of a tea pot?!  I'm grateful that I was encouraged to be in this one!  Yay!


Finally Made Something For Me!

I was originally making this as a gift and then I just kept falling more and more in love with it!  Of course that doesn't mean I won't duplicate it for the recipient ;) but I just love it!  It is my first charm bracelet of this magnitude, it's very jangly and is just full of charms and crystal!  What fun!  Here are a bunch of pictures with close ups.  I can't wait to wear it!


Monday, October 20, 2008

CQ Heart Tutorial

My friend Jane_Kiwi was asking about the CQ Heart process so i did this little "step by step tutorial" :)  

First, print out the heart template: CQ Heart Template [click here]  

1st: Cut out the heart and trace the pattern onto muslin.  


--  

2: Choose your center fabric. A 4 or 5 sided piece is usually best, this will allow for more fabrics along the edges. I have chosen a sheer fabric, so i have a solid piece under it, which is why you see 2 fabrics there. I work with the traced side of the heart face down, but you can see the heart because the pen bleeds thru the other side. 


--  

3. Choose a 2nd fabric and pin it to the first fabric matching the edges, then pin to keep in place. Notice i have made 2 small marks where the first fabric begins and ends. This is just to show you where you will begin and end stitching. 

 
--  

4. Stitch fabrics together, clip loose threads. Then press open. I use a loose piece of muslin i have laying around to cover the fancy fabrics so they don't get scorched :)

 
--  

5. Cut away the excess fabric (where the green extends beyond the white fabric) and pin and stitch down your next piece of fabric. Continue to cut away any fabric that is more than 1/4 past your seam. 


--  

6. Continue to piece around in a clockwise or counter clockwise around the center piece. Pin as you go to keep your fabrics from slipping and sliding all over.

 
--  

Just showing the progression of the piecing until the final piece of fabric is done... The nice thing about doing the hearts is that 4-6 pieces of fabric will be all you need. They're a great beginner piece. 


--  

Now that all of the heart has been covered, here is what the front looks like (certainly doesn't look like a heart!) 


-- 

This is what the back looks like. 


--  

Now how you go from here will be your own personal preference. You can cut away the excess fabric, baste the edges, then zig zag and go from there. I like to baste before i cut away the excess fabric. I lie my heart right side down onto the feed dogs and machine baste with my largest stitch. I baste first so that as i'm cutting pieces of fabric aren't flopping all in front of my scissors and it also holds the fabric safe and securely. I've accidentally cut into the fabric i'd be embellishing because it was flopping all over while cutting. So with the back side up so i can see my tracing lines, i baste about 1/3" inside. 


--  

Cut away excess fabrics. Cut exactly along the traced line.  

The basting along the edges is put there as a reminder NOT to embellish past that. If you start stitching buttons and beads there, when you go to sew them down to something or what have you, your needle will come in contact with the embellishments and well... i will leave you to imagine the rest 


--  

Lastly, zigzag or serge your edges so that they do not fray like crazy as you embellish them! And you have your heart! Great Job! 


© Copyright 2008 The Talia Effect 
Reprint Permissions Policy:  
You may reproduce or copy this page in print for non-commercial, non-profit teaching and educational use only. Proper acknowledgement must be given to The Talia Effect for any material reprinted.

Saturday, October 18, 2008

"Think Girly" Order Up!


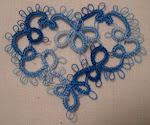
'The mad tatter' as I like to think of myself was at it again at the request of my friend Sherry.  She had contacted me to make her some tatted goods for a CQ block she was going to be embellishing.  "Think girly" she says, and that is all she says. . . So, i thought girly with the butterfly and clover leaf heart, and then the ecru 80wt tatted basket was where 'delicate girly and dainty' came to mind ;)  

I love the clover leaf hearts.  They are so beautiful.  I look forward to the day i learn to shuttle tatt though because needle tatting tends to work things up larger, a lot larger than shuttle tatting would.  With needle tatting you have to rely on working the thread on the needle.  With shuttle tatting you work the piece on only the thread, so it's only as wide as the thread, and with 80wt, that is pretty small!  Regardless, they came out pretty and I love them!  Once all dressed up for a night out on the town, I think they'll be dazzling and whimsical!