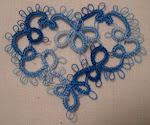
My friend Jane_Kiwi was asking about the CQ Heart process so i did this little "step by step tutorial" :)
1st: Cut out the heart and trace the pattern onto muslin.
--
2: Choose your center fabric. A 4 or 5 sided piece is usually best, this will allow for more fabrics along the edges. I have chosen a sheer fabric, so i have a solid piece under it, which is why you see 2 fabrics there. I work with the traced side of the heart face down, but you can see the heart because the pen bleeds thru the other side.

--
3. Choose a 2nd fabric and pin it to the first fabric matching the edges, then pin to keep in place. Notice i have made 2 small marks where the first fabric begins and ends. This is just to show you where you will begin and end stitching.


--
4. Stitch fabrics together, clip loose threads. Then press open. I use a loose piece of muslin i have laying around to cover the fancy fabrics so they don't get scorched :)

--
5. Cut away the excess fabric (where the green extends beyond the white fabric) and pin and stitch down your next piece of fabric. Continue to cut away any fabric that is more than 1/4 past your seam.

--
6. Continue to piece around in a clockwise or counter clockwise around the center piece. Pin as you go to keep your fabrics from slipping and sliding all over.


--
Just showing the progression of the piecing until the final piece of fabric is done... The nice thing about doing the hearts is that 4-6 pieces of fabric will be all you need. They're a great beginner piece.
--
Now that all of the heart has been covered, here is what the front looks like (certainly doesn't look like a heart!)
--
This is what the back looks like.

--
Now how you go from here will be your own personal preference. You can cut away the excess fabric, baste the edges, then zig zag and go from there. I like to baste before i cut away the excess fabric. I lie my heart right side down onto the feed dogs and machine baste with my largest stitch. I baste first so that as i'm cutting pieces of fabric aren't flopping all in front of my scissors and it also holds the fabric safe and securely. I've accidentally cut into the fabric i'd be embellishing because it was flopping all over while cutting. So with the back side up so i can see my tracing lines, i baste about 1/3" inside.
--
Cut away excess fabrics. Cut exactly along the traced line.
The basting along the edges is put there as a reminder NOT to embellish past that. If you start stitching buttons and beads there, when you go to sew them down to something or what have you, your needle will come in contact with the embellishments and well... i will leave you to imagine the rest
--
Lastly, zigzag or serge your edges so that they do not fray like crazy as you embellish them! And you have your heart! Great Job!
© Copyright 2008 The Talia Effect
Reprint Permissions Policy:
You may reproduce or copy this page in print for non-commercial, non-profit teaching and educational use only. Proper acknowledgement must be given to The Talia Effect for any material reprinted.


